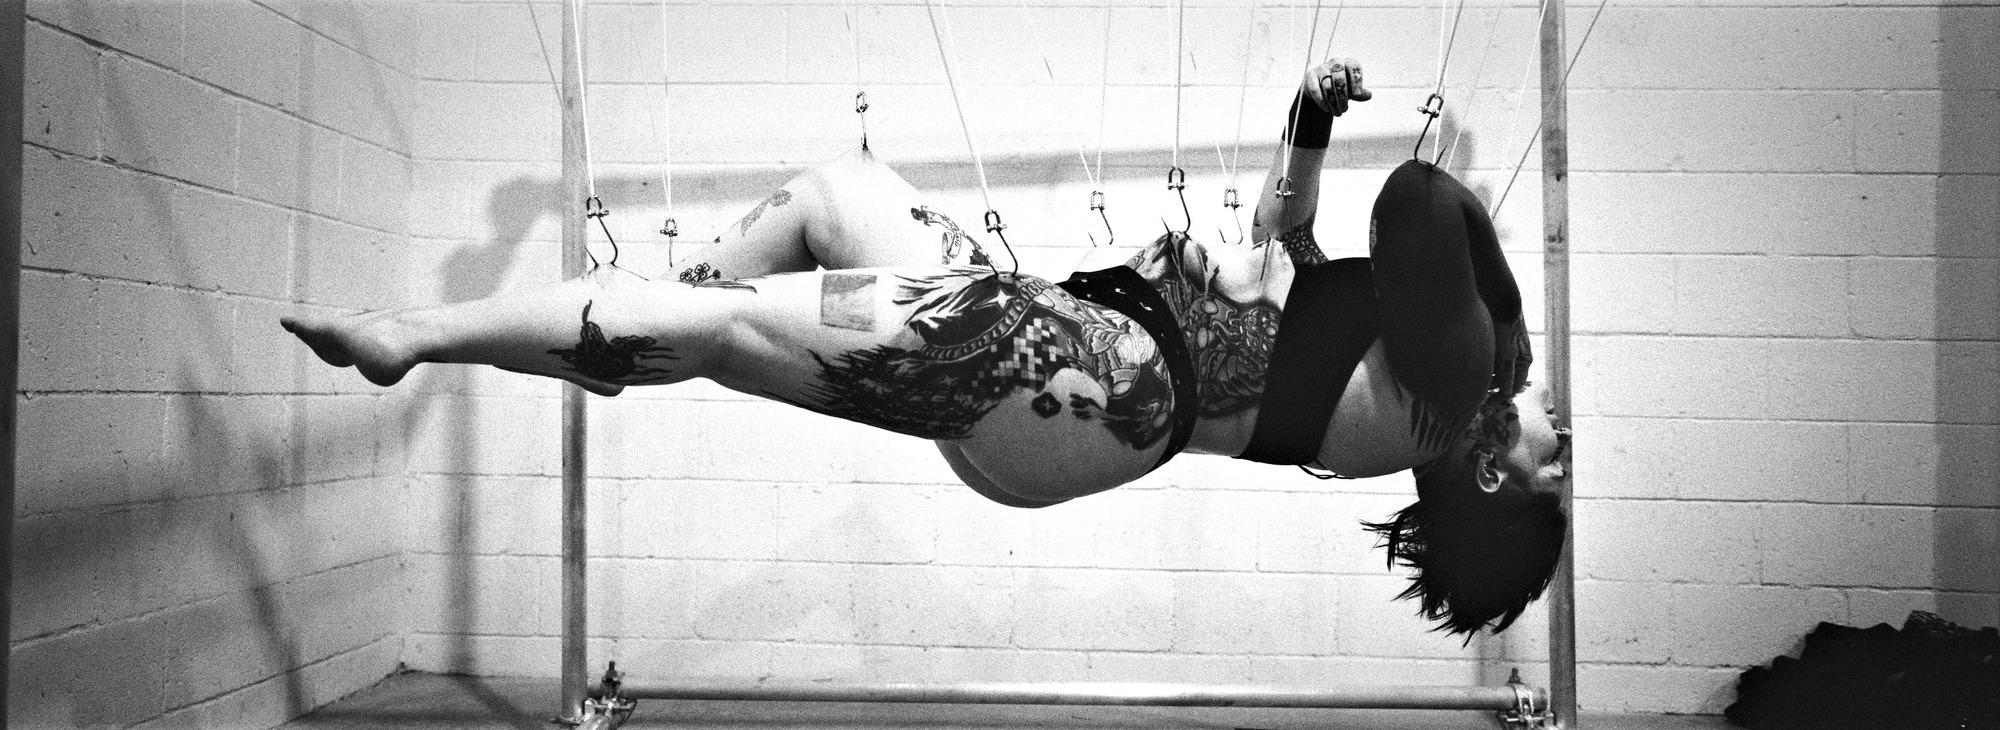
Hey ModBloggers, this week we’ve got a follow-up that encompasses a number of procedures in an effort to explore rescarification. IAM: Nilrym, who you may remember from this follow-up post last year, has over the past 2 years been working on developing a scar to accompany a tattoo that he has. With the help of Brian Decker from Pure Body Arts in NYC, Nilrym has explored traditional cutting scarification, branding, and tattoo machine scarification (Note to Jen: We really need to rename the “Tattoo Gun Scarification” gallery)
Nilrym was generous enough to provide a reflection on all of his experiences, which I’ll include with the photos below.
Rescarification, was a hopeful concept for me prior to getting my first scarification piece. I knew that I have highly elastic skin, and that I most likely would not heal the very distinctive and textured keloids I was seeking. However this never bothered me, because the concept of rescarification always seemed intuitive, and therefore I assumed I could simply scar myself as many times as I wanted until my scar reached the desired height.
I haven’t come across any experiences in the community on rescarifiation. I am sure I could have contacted artist familiar with scarification to get their opinion, but Im not sure how often clients seek this. I think mainly the concept just made sense to me, that if you cut the skin and it scars, then do it again and it will scar more. Basically I decided to do rescarification because there seemed no reason to question that it wouldnt work. In the end I went for it, because I figured the scar results were only limited by my effort.
My first experience with Rescarification was the outline of my chest tattoo Anicca, I had it cut followed by branding after it had healed. My results and experience which mainly focuses on the commitment and exhaustion of aftercare is here: https://www.bme.com/2011/08/12/the-friday-follow-up-43 The results of my first scarification piece didn’t improve with rescarification, but I honestly had little hope for it to do so. The design was very thin, so it just didn’t seem to have enough area to agitate. For this reason I didn’t really consider it a proper gauge of rescarificaition.
2nd piece of scarification involved skin removal instead of just cutting and a larger area, so I thought it had potential for rescarification. I tried 3 different methods, and let each session properly heal.
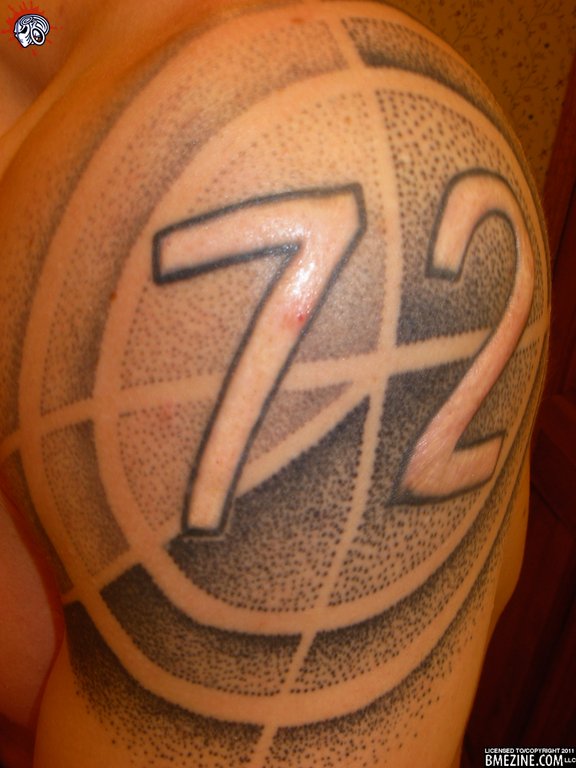
My goal and desire was that I wanted the numbers to heal into big keloids and really pop.
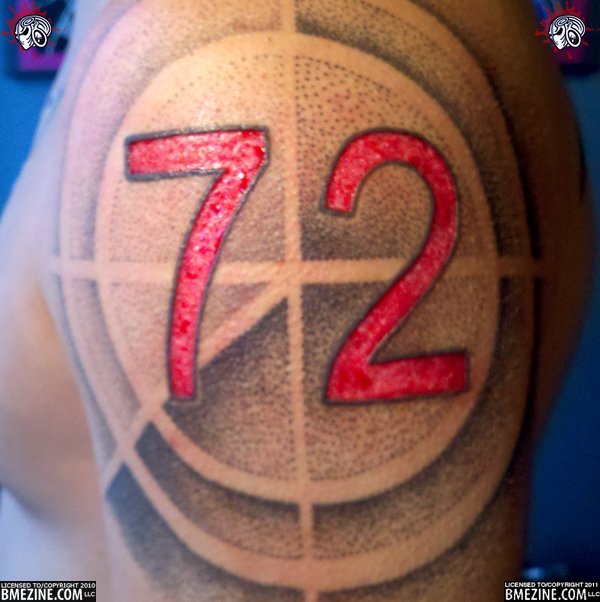
Here is the initial scarification piece, the day it was done.
And here’s how it looked four months later.
Note: Its difficult to tell, but the main definition of this scar is in the ’2′. The diagonal part and bottom curve of the 2 are noticeably raised while the rest of the scar is minimally raised.
Read on to see what happened next for Nilrym and his scar.
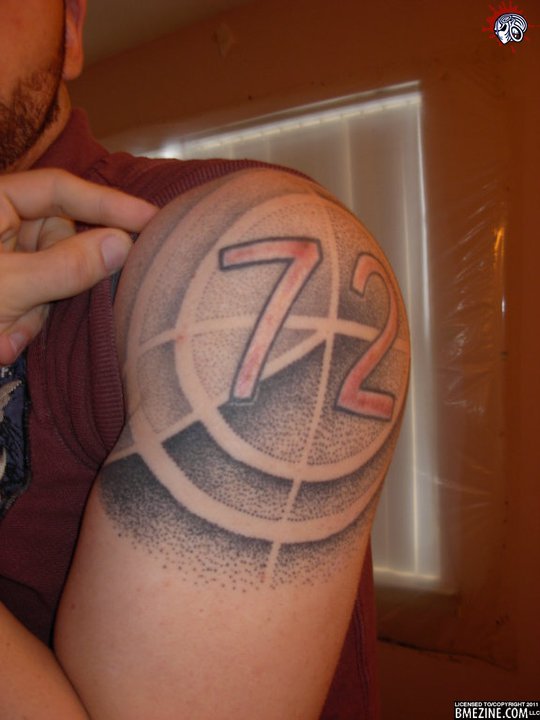
Next up was a hyfrecator branding over top of the initial scar tissue. Also done by Brian Decker.
And here’s how it looked 5 months later. At this point the initial scar is around 10 months old.
Note at this point I had minor distortion of the tattoo from the keloid tightening the surrounding skin. All the same characteristics of the original scar. Noticeable raised 2 on diagonal and corner but minimal everywhere else.
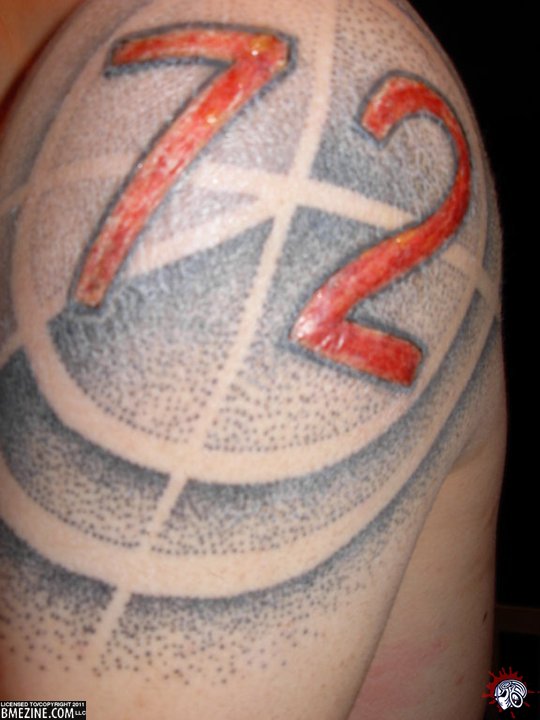
The final step involved using a tattoo machine to go over the entire surface of the scar. Rob D from Broadway Tattoo Shop in South Amboy did the procedure here.

Note: This felt like it had a lot of potential, it felt very puffed and agitated in a good way. I wish I had access to a tattoo machine to user earlier in the healing phase and possibly every few days. I would be curious to see if this would improve scar healing. Instead of having the tattoo machine run with just water, I had them use diluted white ink, so as the scar turns white it will be even lighter.
And here’s the final result 6 months after the tattoo scarification. At this point it has been 1 year and 4 months since the initial scarification.
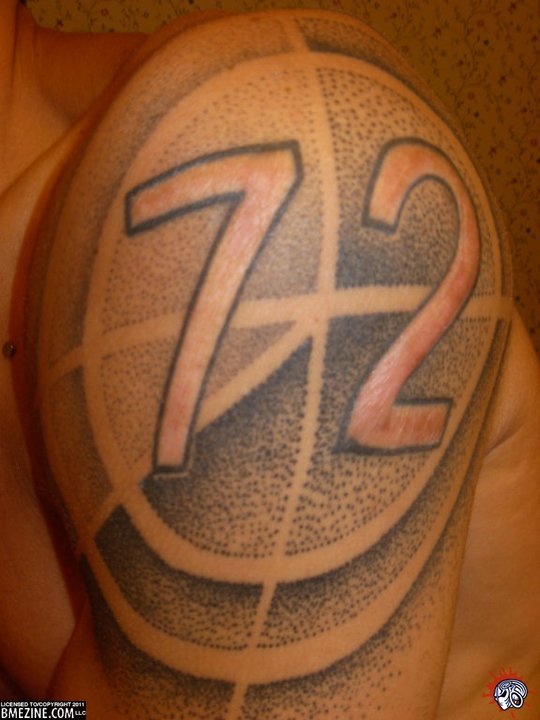
I doubt there is much difference between my initial healing and the current state now despite putting two attempts at rescarification on top of it. With this scar piece I also agitated it more with a tooth brush in all phases then I had my first piece, so I think I had more potential to gain results with more aggressive aftercare.
So yea.. This is my experience, and I found rescarification gave me no additional benefit. Everyone is different and heals different, so there could be people who would have more success then I did. Hopeful people find this helpful if they are considering rescarification.
A big thank you to Nilrym for sharing this experience with us. While it sounds like it didn’t turn out the way he had planned, but like he said, everyone heals differently, so what didn’t work for him, may work for others. Make sure to check out Nilrym’s page and the galleries for more photos and comments.